The post Steps to Take After Migrating Your Website to GreenGeeks appeared first on GreenGeeks Support.
]]>We’re excited to have you on board, and our goal is to ensure no disruptions result from the website migration.
Once your website contents, including any databases, have been successfully copied over, follow the steps below to ensure everything is set up and running smoothly.
Point Your Website to GreenGeeks
The first step after moving your website is to point your domain to our servers.
There are two ways to point your domain to the GreenGeeks network, updating the nameservers(the most common method), and by using 3rd party DNS with an A record.
Updating the nameservers ensures visitors reach the site hosted on GreenGeeks, and gives you the ability to control all DNS records from within your GreenGeeks Dashboard.
Nameservers
To update the nameservers:
- Log in to your domain registrar’s account (where you bought your domain).
- Locate the DNS settings for your domain.
- Update the nameservers to the ones provided in your welcome email:
- ns1.greengeeks.net
- ns2.greengeeks.net
- Save the changes
- Allow up to 24 hours for the DNS changes to propagate globally.
The exact steps to update the nameservers for your domain will vary depending on the existing domain registrar; contact your existing domain registrar is you need assistance setting the GreenGeeks nameservers on your migrated domain.
A Record
Alternatively, to keep the existing nameservers, and point only the website to GreenGeeks it’s possible to adjust the A records only.
To adjust the A records, you’ll first need to obtain IP address assigned to your hosting service:
- Go to the Manage Hosting Service section of your GreenGeeks Dashboard.
- Locate the Server Information area.
- Copy the IP Address listed for your service.
- Update all existing A records using the new IP address. GreenGeeks cannot do this for you.
The exact process for this varies depending on the existing DNS provider, and you should contact the existing provider for assistance with the A record updates.
Domain Name Transfer
A Domain Name Transfer is a separate process from the Website Migration that moves the domain registration from the existing registrar to GreenGeeks’ partner registrar, allowing you to manage your domain name & hosting in the same Dashboard.
The Domain Name Transfer process is totally optional and you can fully utilize your GreenGeeks Hosting Service simply by updating the nameservers for your domain, a domain transfer is not required.
Refer to the GreenGeeks Domain Transfer Instructions for step-by-step instructions on transferring a domain name to GreenGeeks.
Access Your GreenGeeks Hosting Account
- Go to https://my.greengeeks.com/
- Log in with the email address and password from your GreenGeeks Welcome email.
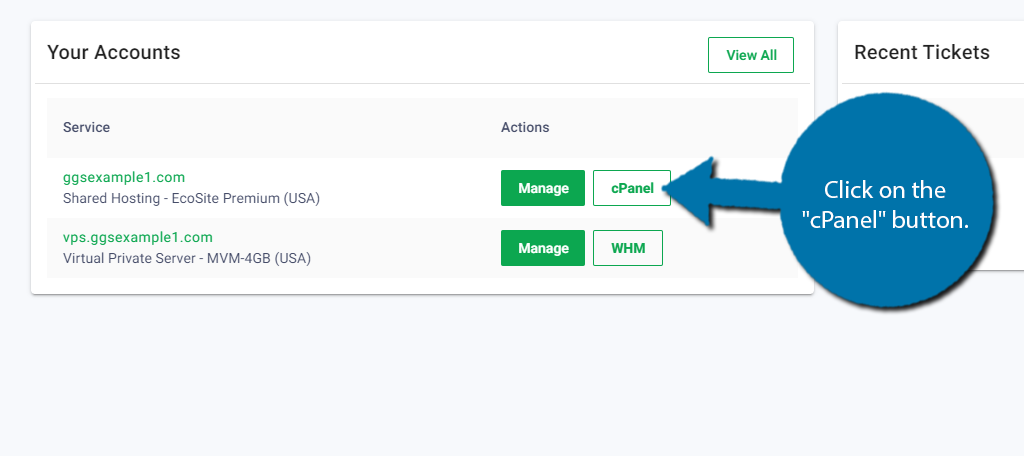
- Click the Manage button next to your hosting service to access the Hosting Management functions within the GreenGeeks Dashboard, or click the cPanel button to access cPanel directly, without a password.
Review the Website
After the nameservers have been adjusted, and you’ve allowed some time for DNS propagation to take place, review the newly migrated website.
Note that if you have not yet updated the nameservers, you’ll need to configure a local DNS override to access the migrated site on GreenGeeks, until the nameservers are updated.
- Open your web browser in Incognito or Private Mode, and go to your domain.
- Navigate through your website to check that all pages are loading correctly.
- Verify the functionality of contact forms, links, and other interactive elements.
- Update any backend Email Settings to reflect the new server information.
Email Accounts
If using email services associated with your domain, you’ll also need to update your email client settings.
- Go to the Manage Hosting Service section of your GreenGeeks Dashboard.
- Click on the Email tab in the Management menu bar
- Select the Email Accounts option in the drop-down menu.
- Create email accounts as needed (if they weren’t migrated).
- Using the Actions menu next to each Email Account, select Mail Configuration to review the new mail server settings.
- Update your email clients (Outlook, Thunderbird, etc.) with the new server settings.
SSL
GreenGeeks provides automatic SSL for all domains; once the DNS is updated for your domain, our system will issue an SSL certificate.
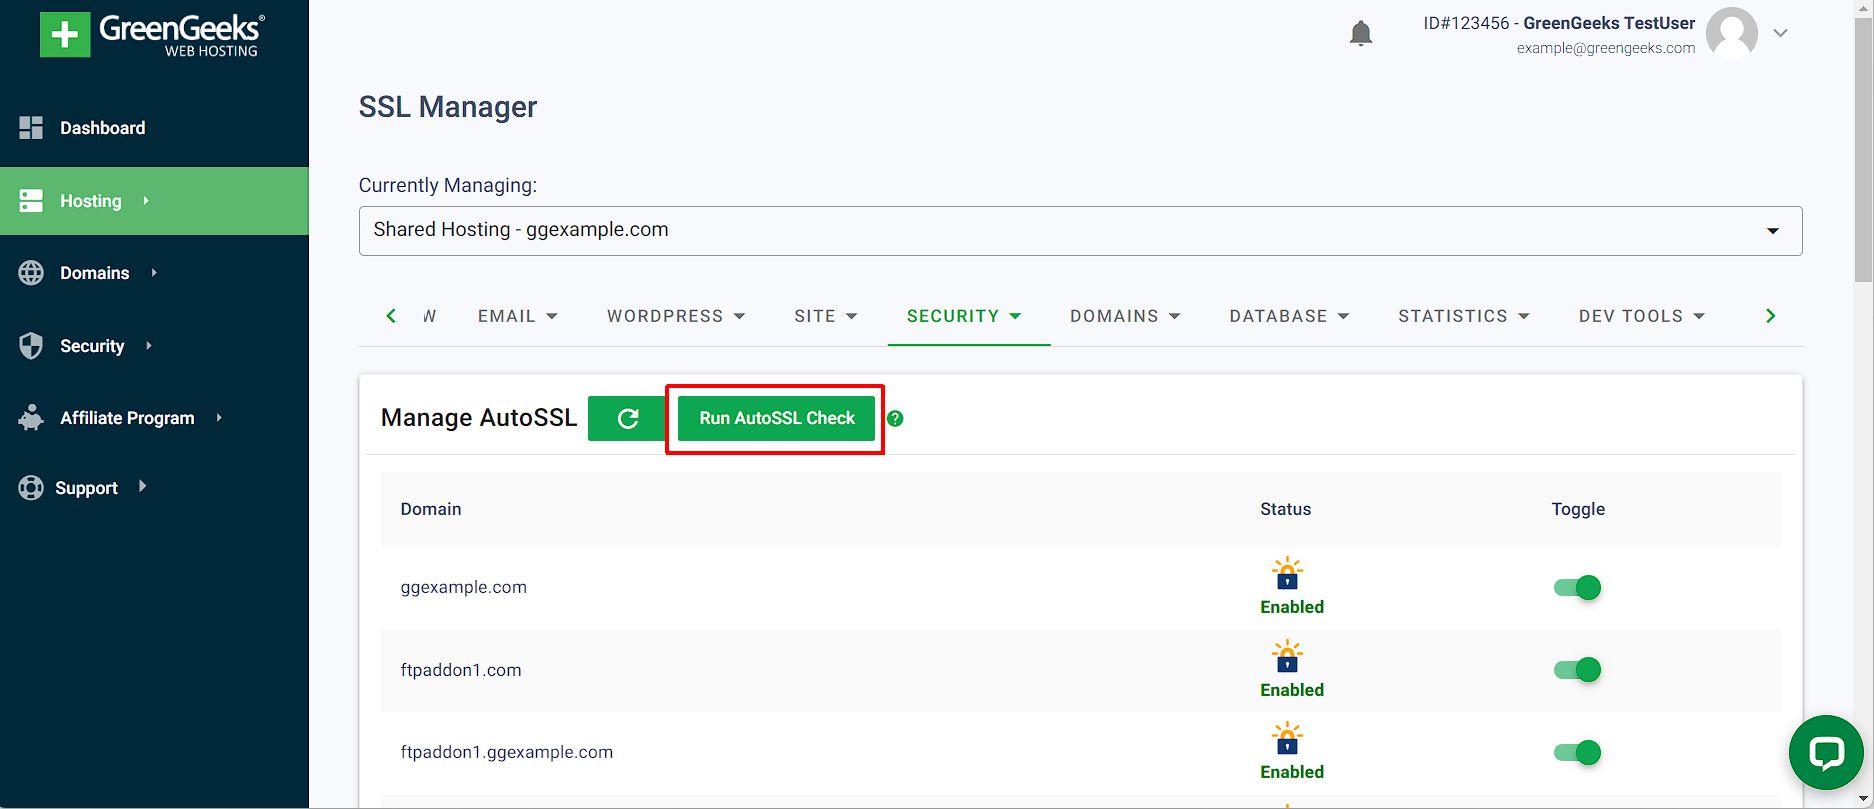
To manually re-run the SSL DNS check for your domain:
- Go to the Manage Hosting Service section of your GreenGeeks Dashboard.
- Click on the Security tab in the Management menu bar
- Select the SSL Manager option.
- Click the “Run AutoSSL Check” button to re-check the DNS for your domains. Domains found to be pointed to the GreenGeeks server will be automatically issued an SSL certificate.
Optimization
While website optimization is important to ensure the smoothest experience possible for visitors, the exact optimization steps depend largely on the type of website, refer to the GreenGeeks Blog for WordPress optimization recommendations.
For WordPress sites, GreenGeeks will automatically enable the recommended Litespeed Cache plugin as part of the migration process, and any existing caching plugin will be deactivated to avoid a conflict.
If you notice any issues with your website after the migration, try to disable the Litespeed Cache plugin before attempting other debugging steps.
Website Updates
WordPress offers several methods of automatically keeping your website up-to-date. Themes & Plugins can be configured for auto-update directly within the WordPress Dashboard using the following instructions:
Enabling Automatic Updates for Plugins
- Log in to your WordPress Admin Dashboard.
- Navigate to the Plugins Page:
- Go to Plugins > Installed Plugins.
- Enable Automatic Updates:
- For each plugin you want to auto-update, click the Enable auto-updates link next to the plugin.
Enabling Automatic Updates for Themes
- Navigate to the Themes Page:
- Go to Appearance > Themes.
- Enable Automatic Updates:
- Click on the theme you want to auto-update to open its details.
- Click the Enable auto-updates link.
By default, WordPress Minor Releases are processed automatically, while Major Releases require manual action as these contain more significant changes. Refer to the GreenGeeks Blog to enable automatic WordPress Major Release updates.
Malware
GreenGeeks offers real-time malware scanning, and all newly migrated websites are scanned within a few hours of being transferred over.
If any Malware is found within your website, GreenGeeks’ Compliance Team will contact you listing the suspicious files identified and provide clean-up options.
If you have any reason to suspect that your website contains malicious files on your existing web hosting provider, you can request that a manual malware scan be performed on your website as part of the migration process in the Comments section of the Migration Request form, or by opening a new Support Ticket.
Further Assistance
GreenGeeks offers extensive Support Articles, Tutorials & guided Webinars and we encourage you to utilize these resources.
If you encounter any issues or need assistance, don’t hesitate to contact the GreenGeeks Support Team, or Open a Ticket from within your GreenGeeks Dashboard.
By following these steps, you’ll ensure a smooth transition and optimal performance for your website on the GreenGeeks hosting platform.
Once again, welcome aboard, and happy hosting!
The post Steps to Take After Migrating Your Website to GreenGeeks appeared first on GreenGeeks Support.
]]>The post Getting Started: Setting Up FTP Accounts in cPanel appeared first on GreenGeeks Support.
]]>You can also create FTP users that have restricted access to only the directories you specify, so you can give an FTP user access to one part of a site, but not others.
In this tutorial, I’ll show you how to set up FTP accounts in cPanel.
Creating a New FTP User Account in cPanel
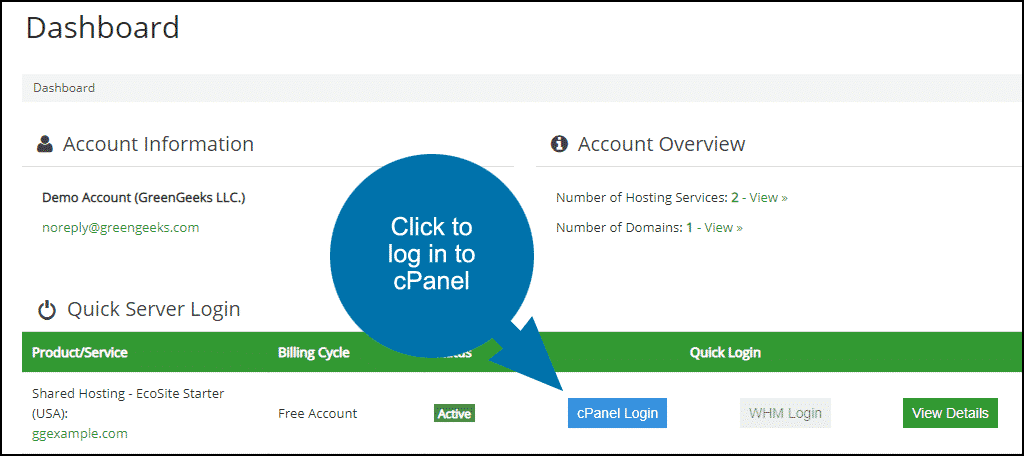
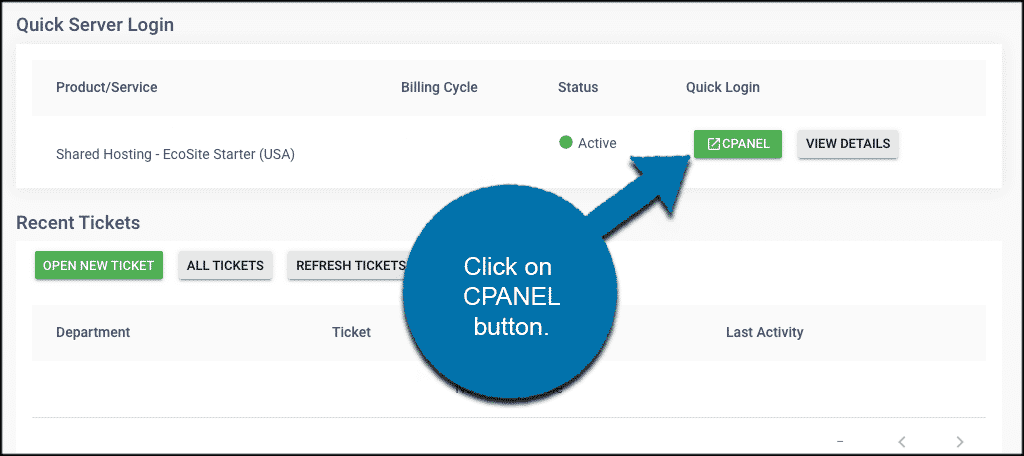
Log in to GreenGeeks and go to cPanel by clicking the “cPanel Login” button in the “Quick Server Login” section.
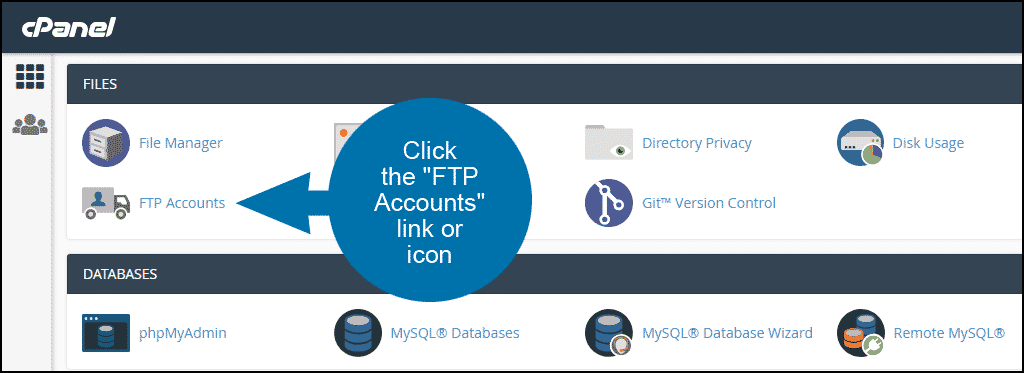
In the “FILES” section, click the “FTP Accounts” link or icon.
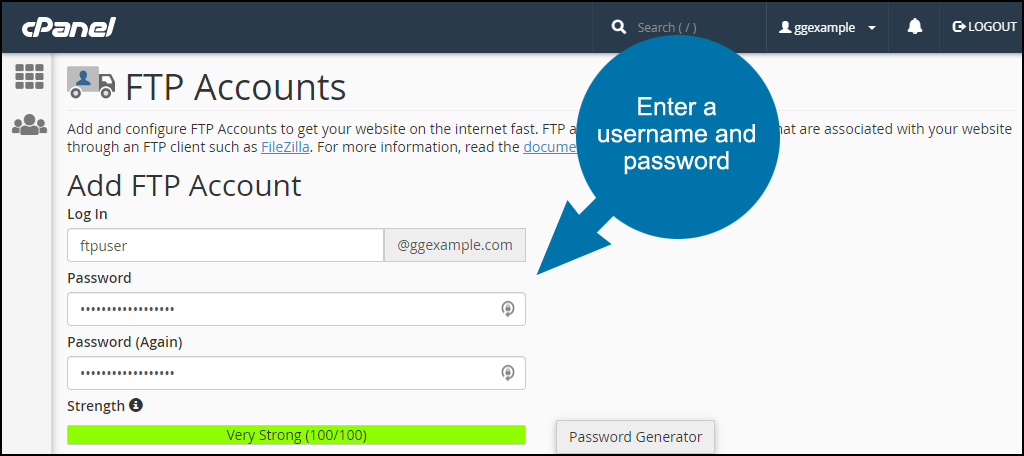
Enter the FTP username for the account in the “Log In” field.
Enter the FTP password in both the “Password” and “Password (again)” fields.
Note that the system will analyze your password or passphrase and reject it with a password strength error if it is too short or not sufficiently complex.
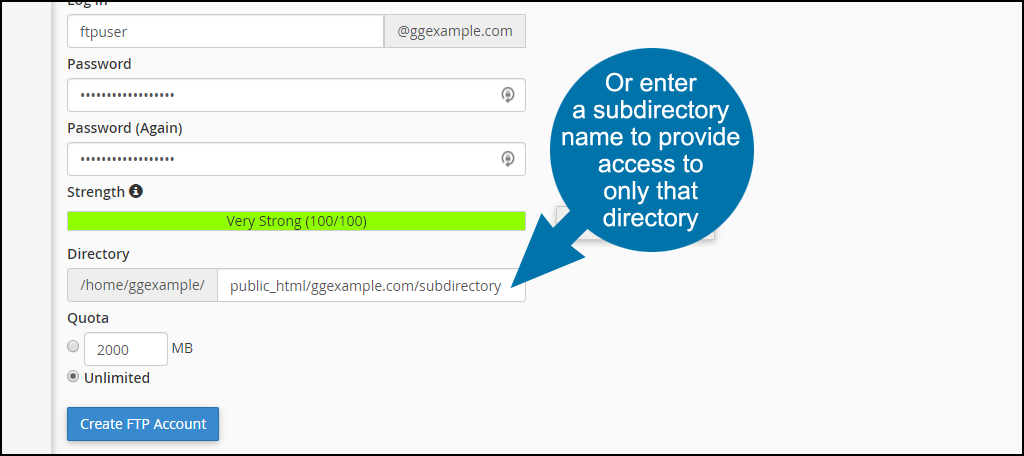
The “Directory” field is automatically populated with public_html/domain.tld/ftpuser (ftpuser is the username that you entered in the “Log in” field and domain.tld is the cPanel account domain).
The user you are creating will not have access to any directories above what is set in the “Directory” field. So you have to change the default entry if you want the new user to have access to your root directory.
In this example, the root directory of the site is “ggexample.com/“. Yours will be different depending on your GreenGeeks account information.
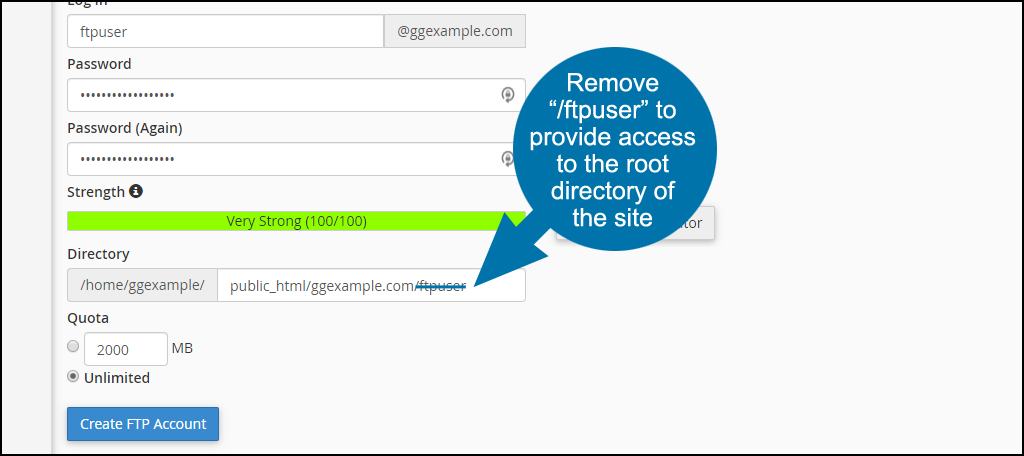
If, however, you intend to create a user that has restricted access to only a specific directory, replace /ftpuser in the “Directory” path with the name of the directory you wish to allow the user to access.
The subdirectory does not have to exist, cPanel will create it for you when the FTP user is created.
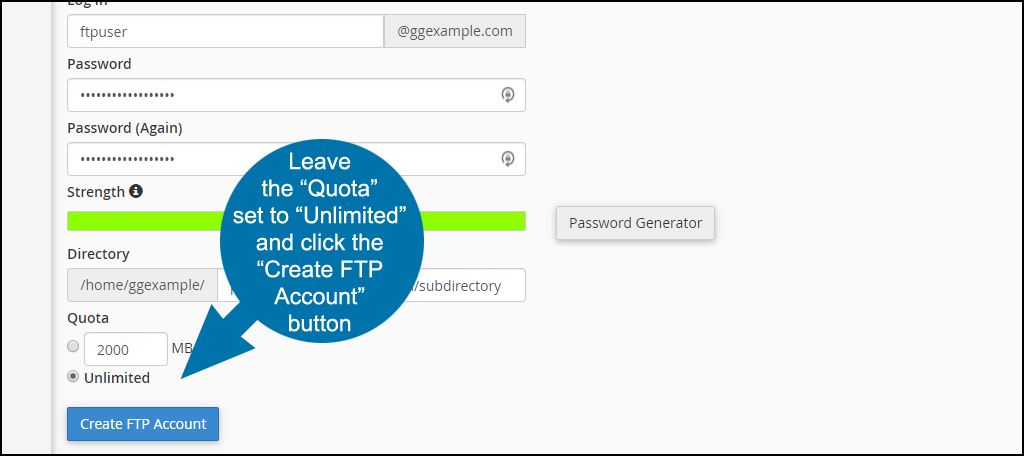
Setting a quota for the user will prevent them from uploading files once the quota is reached. To prevent that problem, leave the “Quota” set to “Unlimited.”
Click the “Create FTP Account” button.
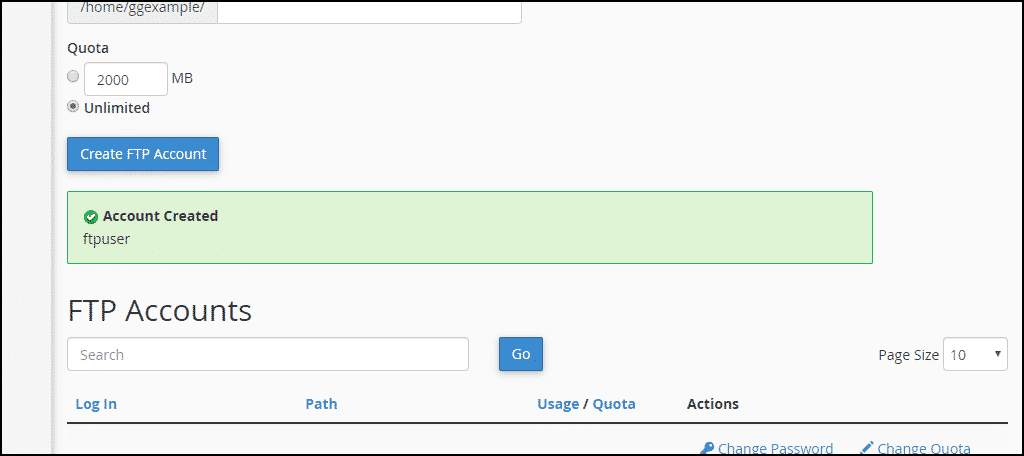
When the user is created, you will see an “Account Created” success notice.
Logging in to an FTP User Account
Once the FTP account is set up, scroll down to the “FTP Accounts” section of the page and click the “Configure FTP Client” link.
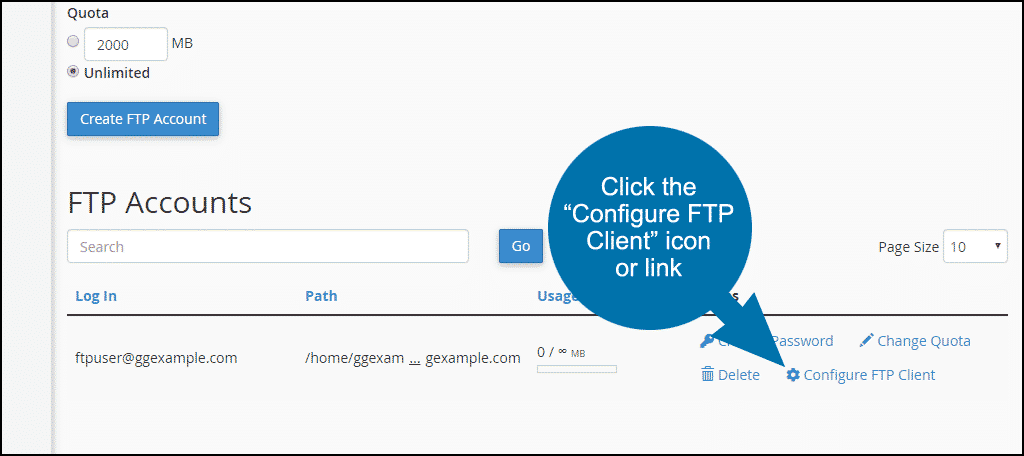
The manual FTP settings and downloadable configuration files for popular FTP programs such as FileZilla and CoreFTP will be shown.
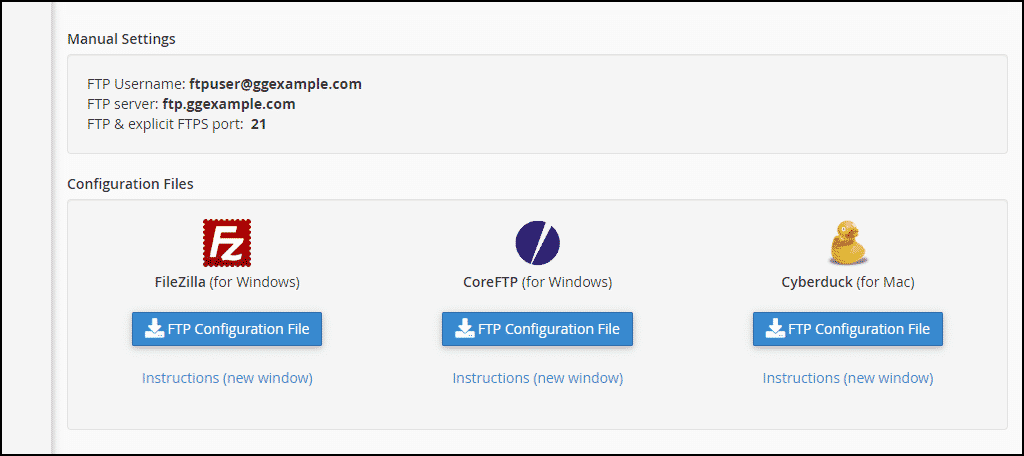
Download the files for your program of choice and use them to configure the tool.
The post Getting Started: Setting Up FTP Accounts in cPanel appeared first on GreenGeeks Support.
]]>The post Getting Started: Building Your Website with SitePad appeared first on GreenGeeks Support.
]]>If you want to get started by building a simple website using SitePad, then follow these simple steps and you will have it installed in no time at all.
This article assumes that you have your domain name transferred to your GreenGeeks account and that you are ready to install SitePad.
Sign in to GreenGeeks. Once inside the AM, you will see a green “CPANEL” button. Click on that to move to the cPanel portion of your hosting account.

Once you are inside cPanel, scroll all the way down to “Software” and click on SitePad Website Builder.
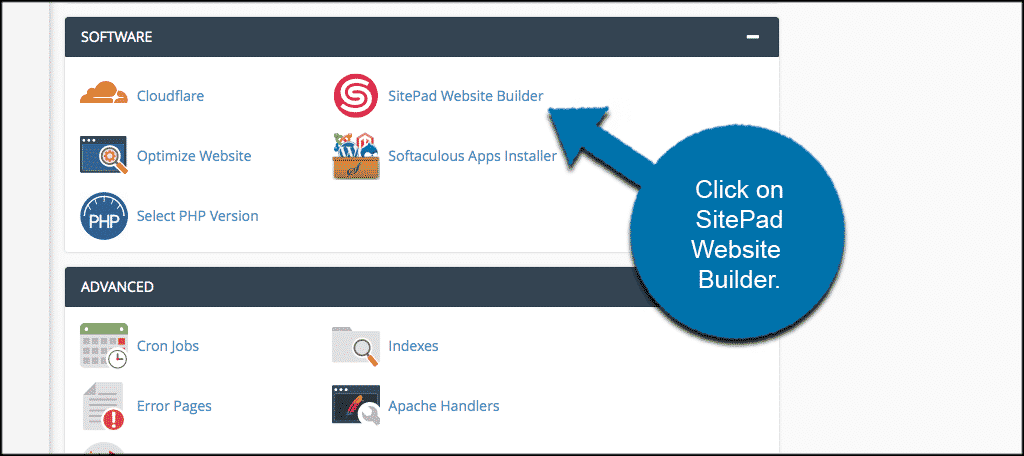
You will be taken to the admin area of the tool.
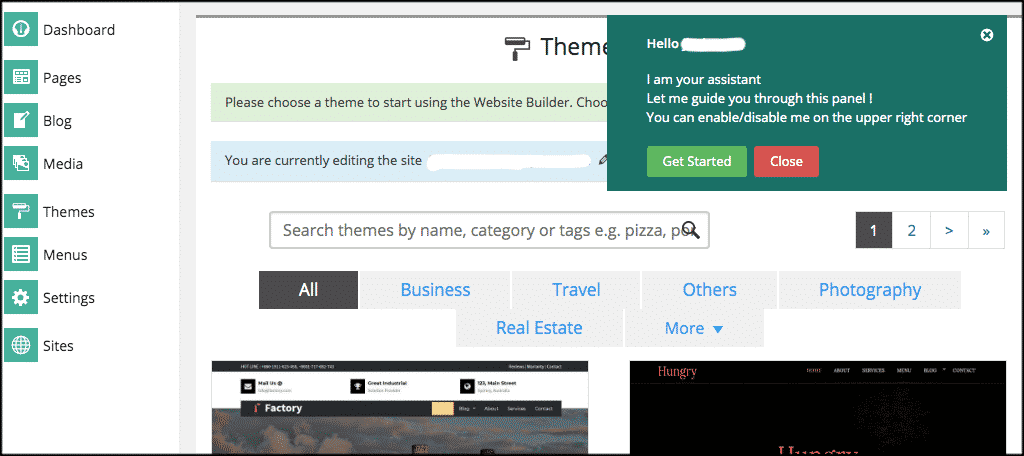
From here you can select a theme using the search area or by clicking on the category buttons.
You can select from any of the available themes. Once you do install the theme, you will be presented with an easy to use drag and drop interface to build your site.
There is also an assistant that is there to help you through the process. It automatically pops up in the top right section of your screen.
That’s it! SitePad is installed and you are on your way.
Other Resources
The post Getting Started: Building Your Website with SitePad appeared first on GreenGeeks Support.
]]>The post Getting Started: Adding Let’s Encrypt SSL to Your GreenGeeks Account appeared first on GreenGeeks Support.
]]>SSL certificates not only offer protection to visitors, but search engines like Google also put more emphasis on sites secured with SSL(https://).
GreenGeeks automatically manages the SSL certificates for your domains, so adding SSL certificates is easy!
DNS Requirements: Domain Control Validation(DCV)
GreenGeeks automatically issues Lets Encrypt SSL certificates for all domains using DNS-based Domain Control Validation(DCV), which involves verifying that the requester of the SSL certificate has control over the domain.
DCV uses DNS or HTTP verification and works for domains pointed to the GreenGeeks Anycast Nameservers or those using 3rd party nameservers with A records, including Cloudflare.
Adding a new SSL Certificate
Whenever a new domain is added, the backend server will attempt to complete DCV for that domain to issue an SSL certificate. This process usually takes no more than 5-10 minutes.
Run AutoSSL Check
The first DCV check happens automatically a few minutes after a domain is added, but it’s also possible to run an AutoSSL DCV check on-demand at any time.
GreenGeeks Dashboard
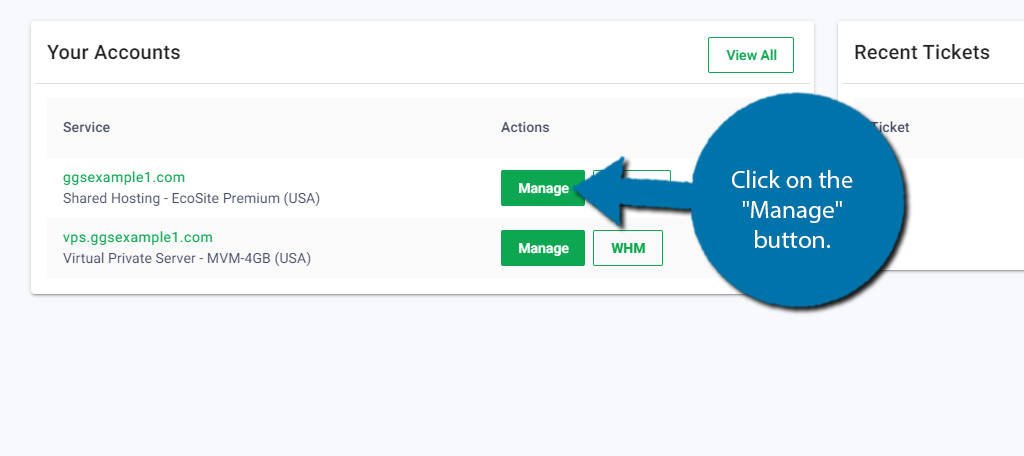
- Click the Manage button next to your hosting account.

- From the Hosting Management view, open the Security drop-down menu and select the SSL Manager.
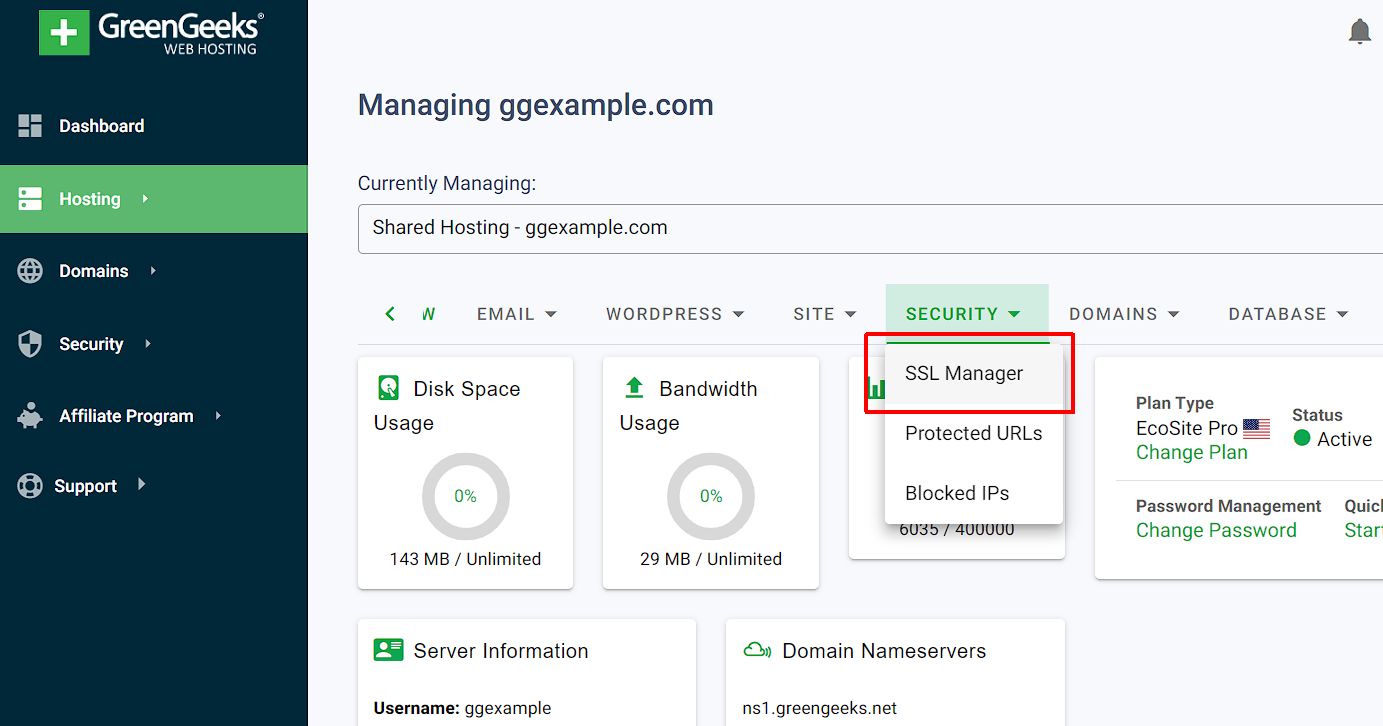
- On the SSL Manager page, click “Run AutoSSL Check” to run an AutoSSL check for all domains on that hosting account.
cPanel
- Login to cPanel.
- Click the cPanel icon in your GreenGeeks Dashboard.
- Within cPanel, Scroll down to the “Security” section.
- Click on the “SSL/TLS Status” icon.
- Click the “Run AutoSSL” button.
- AutoSSL will begin requesting, verifying, and installing the SSL certificate. You can monitor the progress on the same page.
- Once the AutoSSL process is complete, you will receive a confirmation message indicating whether the SSL certificate installation was successful.
Post Installation
After installation, you should verify that the SSL certificate is working correctly; try to access your website via HTTPS (e.g., https://www.yourdomain.com) and check for the padlock icon in the browser’s address bar.
For WordPress-based websites, GreenGeeks recommends updating the URLs directly within the MySQL DB to include HTTPS to avoid the additional performance overhead of using a plugin to do this, like Really Simple SSL.
DNS Not Pointed / Installation Fails
If GreenGeeks cannot complete DCV checks for a domain, such as when the DNS isn’t pointing to GreenGeeks, we won’t be able to issue the SSL certificate.
If you manage your DNS, check out this article about DNS updates that may be necessary to use Let’s Encrypt.
GreenGeeks will continue to re-try the DCV daily until we can issue the SSL certificate or the domains excluded from AutoSSL.
Exclude Domain from AutoSSL Coverage
You can exclude a specific (sub)domain from the AutoSSL DCV check by disabling AutoSSL coverage on that (sub)domain.
To exclude a domain, use the toggle within the SSL Manager in your GreenGeeks Dashboard, or access the SSL/TLS Status icon directly in cPanel.
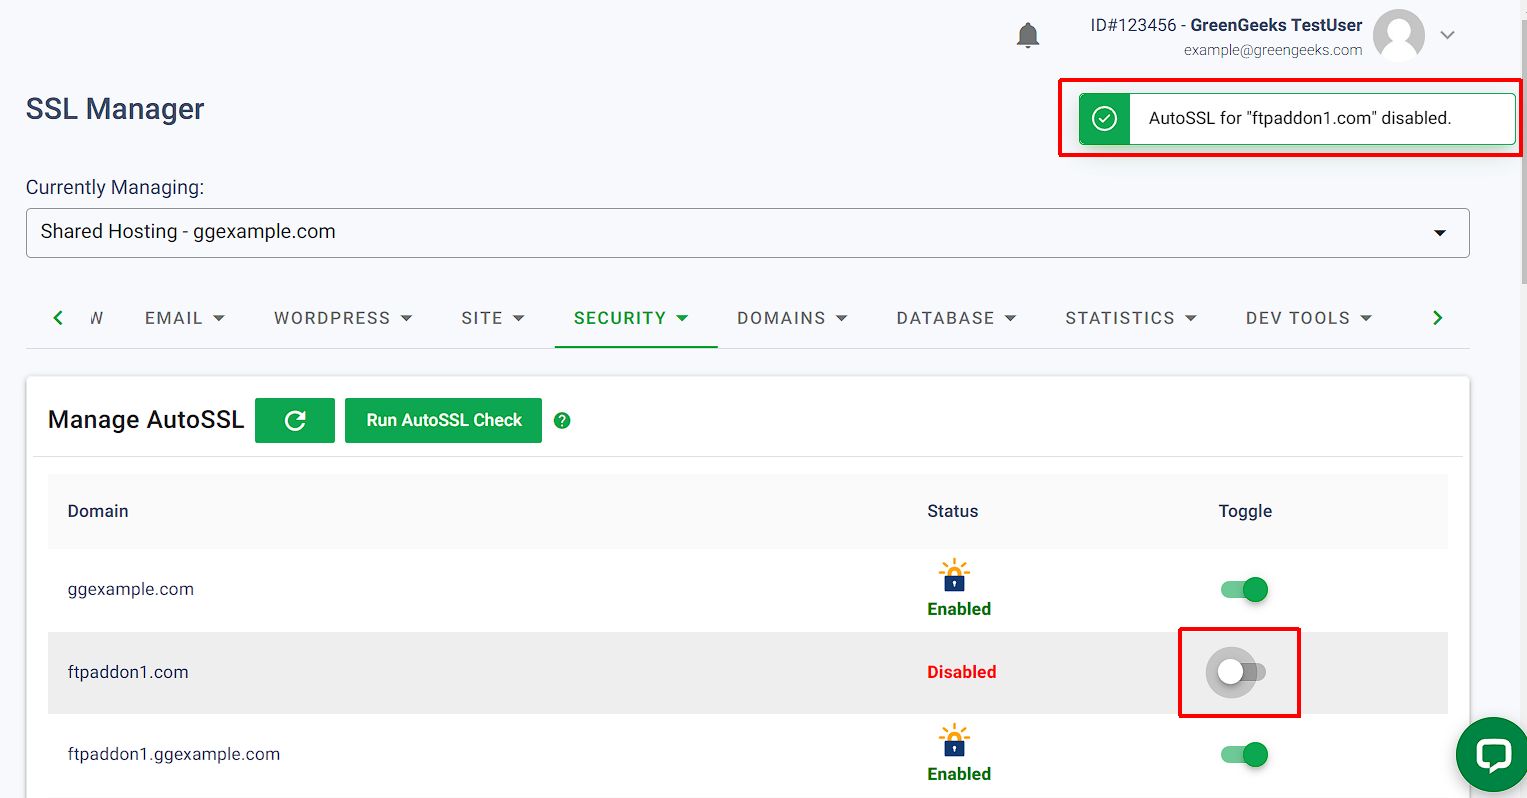
GreenGeeks will not manage the SSL for excluded domains. If you wish to use SSL on an AutoSSL-excluded domain, the certificate will need to be installed manually.
The post Getting Started: Adding Let’s Encrypt SSL to Your GreenGeeks Account appeared first on GreenGeeks Support.
]]>The post Getting Started: Creating Email Autoresponders appeared first on GreenGeeks Support.
]]>Method 1: Creating Email Autoresponders in AM
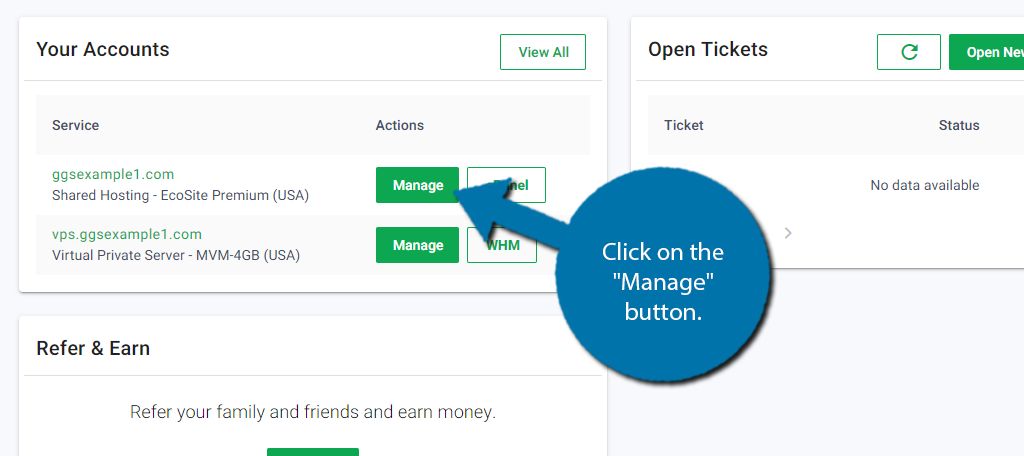
Log in to GreenGeeks and enter the account management section by clicking on the “Manage” button.
Click on the Email tab and select the Autoresponders option.

Enter the email address, from, subject, and body fields.

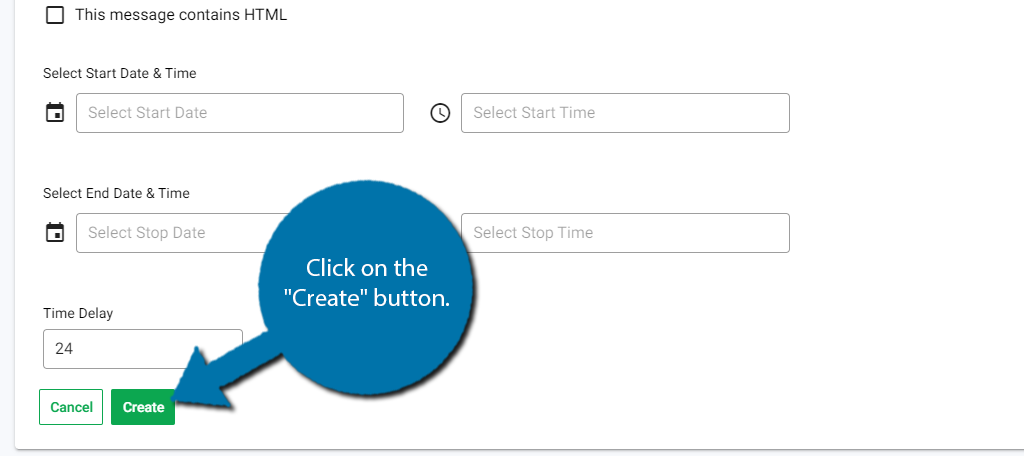
At the bottom, you need to select a time interval when the autoresponder will be active.
Enter the start date & time and the end date & time. You can also choose the time delay value, which is the time period before the autoresponder sends an additional email to the same address.
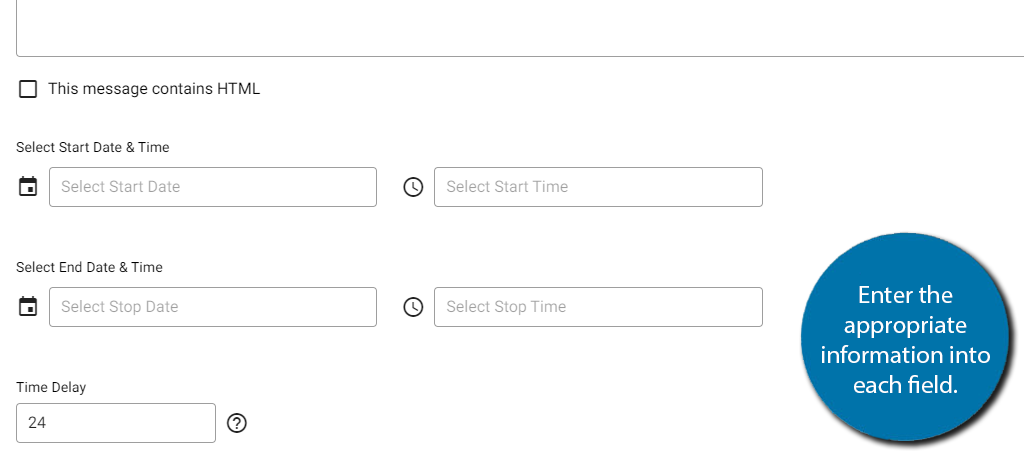
Finally, click on the “Create” button to activate the autoresponder.
Method 2: Creating Email Autoresponders in cPanel
Log in to GreenGeeks and go to cPanel by clicking the “cPanel Login” button in the “Quick Server Login” section.
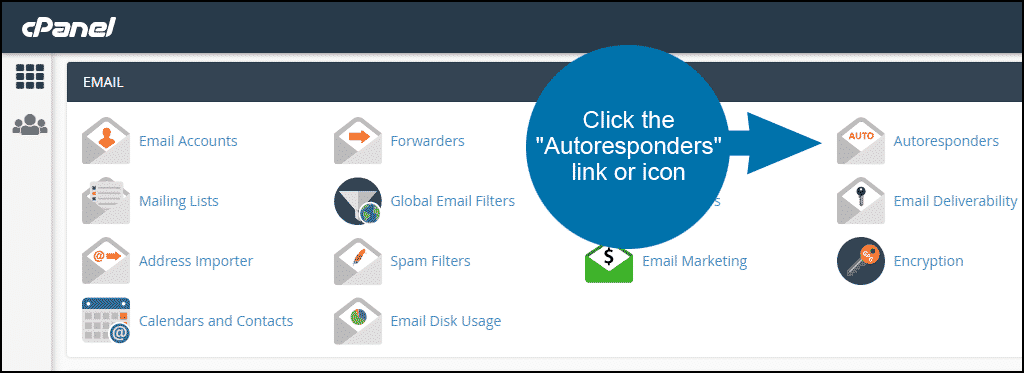
In the “Email” section, click the “Autoresponders” link or icon.
Click the “Add Autoresponder” button.

On the next screen, you will set up all of the configuration data for the autoresponder.
Character Set – for the character encoding of the message. Unless you have a specific reason to change it, leave the default setting of utf-8.
Interval – set the number of hours between responses, to minimize the possibility of sending multiple autoresponses to the same email address.
Email and Domain are where you enter the email address that will send autoresponses to any incoming messages.
From – the username to appear in the response.
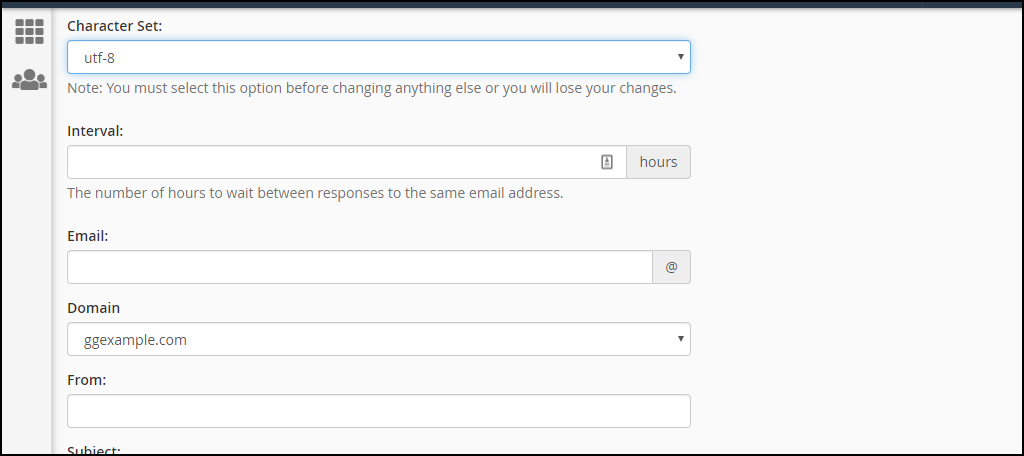
Subject – the subject to appear in the response.
Check This message contains HTML if you intend to use any markup in the body of the email.
Body – the email message. There are a few variables you can use in your autoresponse: %subject%, %from%, and %email%.
Start – when to start sending autoresponses. Select “Immediately,” or chose a date and time by selecting “Custom.”
Stop – when to stop sending autoresponses. Select “Never,” or chose a date and time by selecting “Custom.”
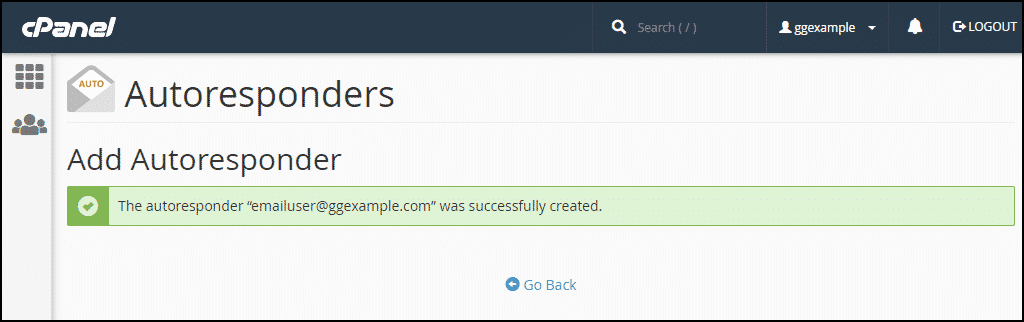
Click the “Create/Modify” button.
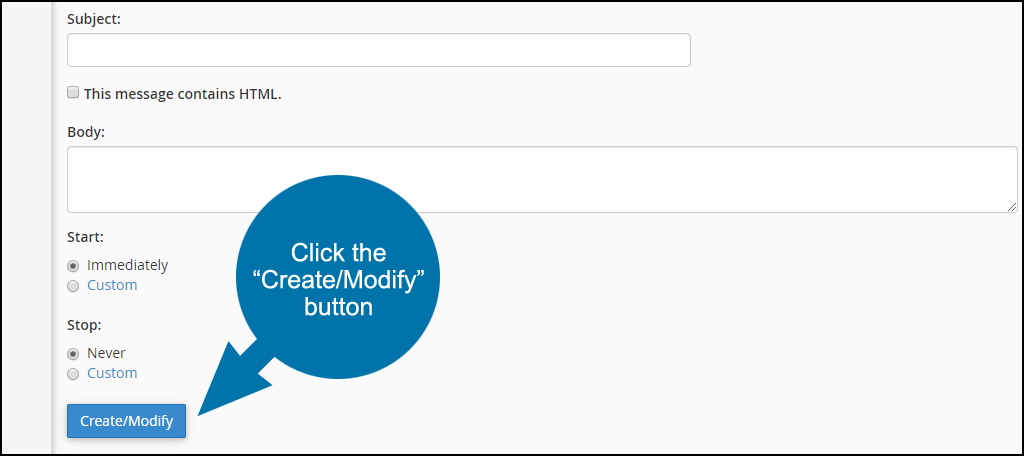
Once the button is clicked, the autoresponder becomes live.
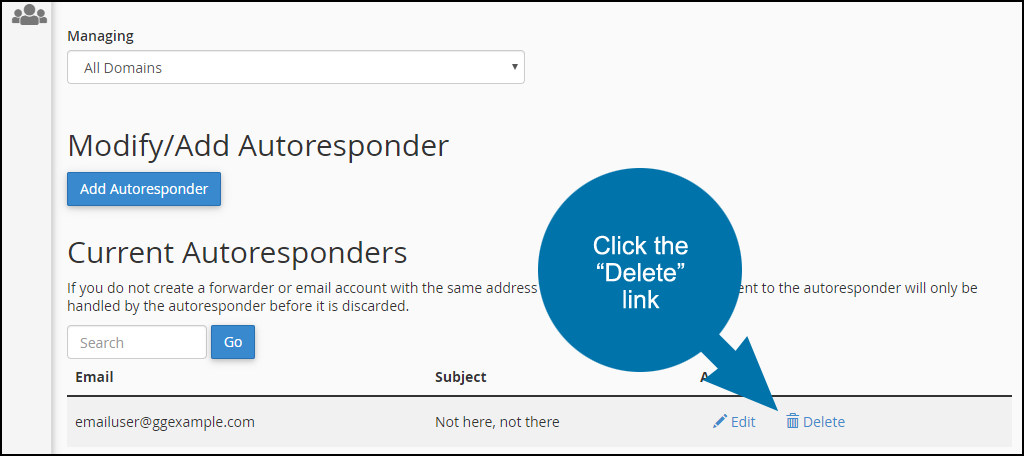
Deleting an Autoresponder
If you ever need to delete an autoresponder, go back and click the “Delete” link.
The post Getting Started: Creating Email Autoresponders appeared first on GreenGeeks Support.
]]>The post Getting Started: Setting Up Email Forwarding appeared first on GreenGeeks Support.
]]>You can set up email forwarding in two different ways.
Important Note: GreenGeeks does not support outside forwarding (i.e. forwarding emails to places like Gmail, Yahoo, AOL, etc.)
Setting up Email Forwarding
Method 1: Using the Account Manager
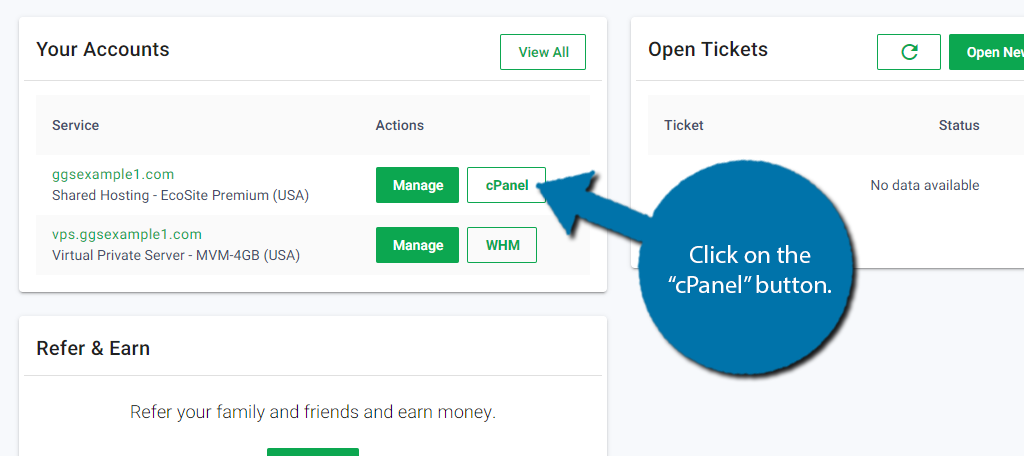
Log in to GreenGeeks and once you are inside your dashboard, click on the “Manage” button.
On the page that comes up, click on the “Email” tab. In the dropdown, select “Forwarders.”
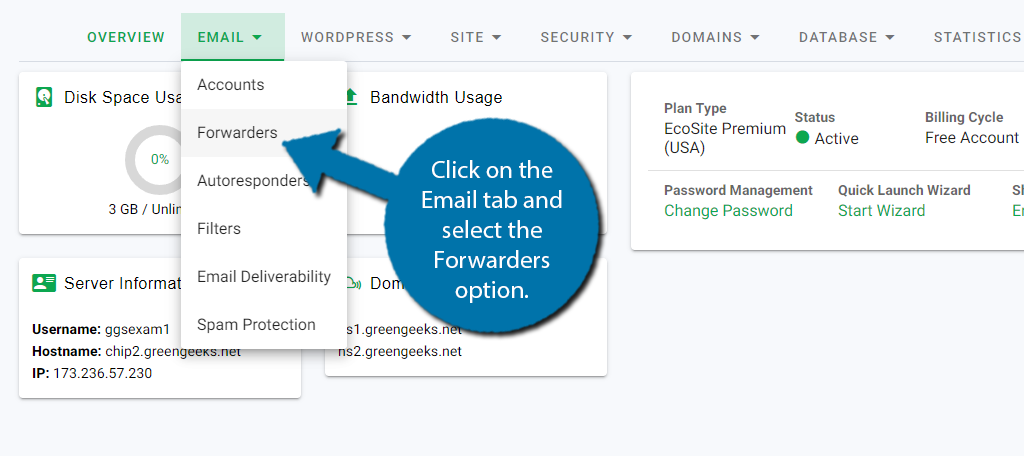
This brings up the page where you can enter the emails you want to be forwarded as well as the email you want to receive the forwards. Fill in this info and click the “Create” button when you are finished.
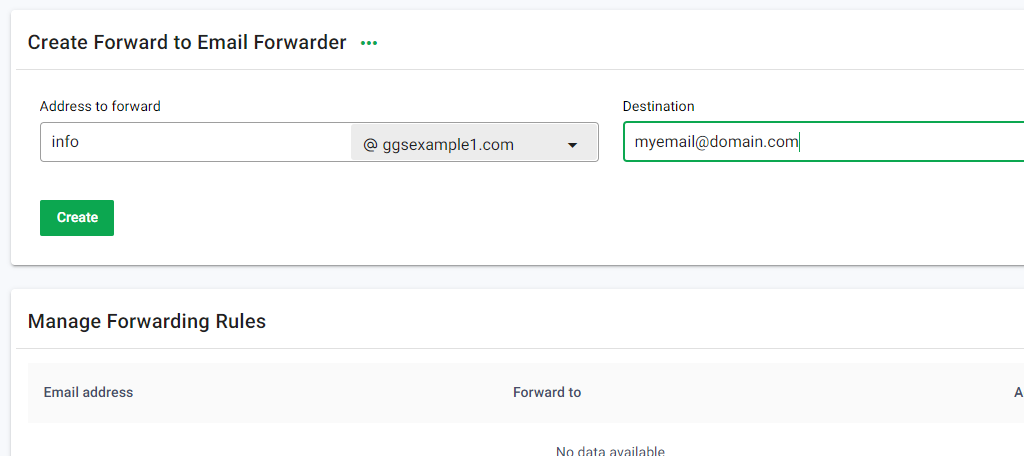
That’s it! You can repeat this process and create another email forward if you need.
Method 2: Using cPanel
Log in to GreenGeeks and go to cPanel by clicking the “cPanel Login” button in the “Quick Server Login” section.
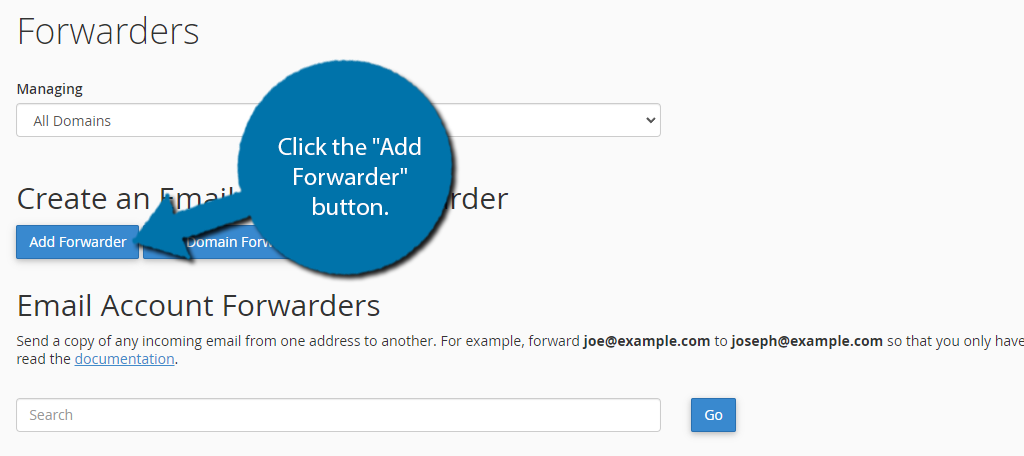
In the “Email” section, click the “Forwarders” link or icon.
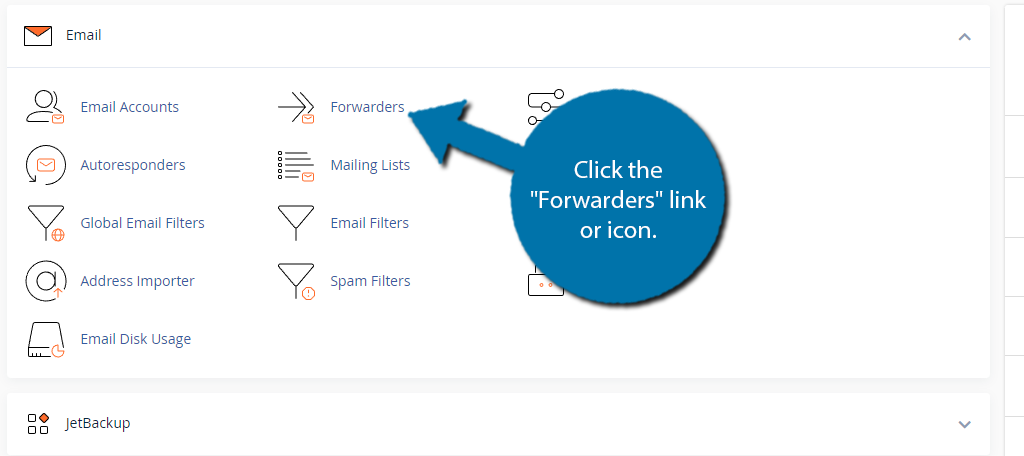
Click the “Add Forwarder” button.
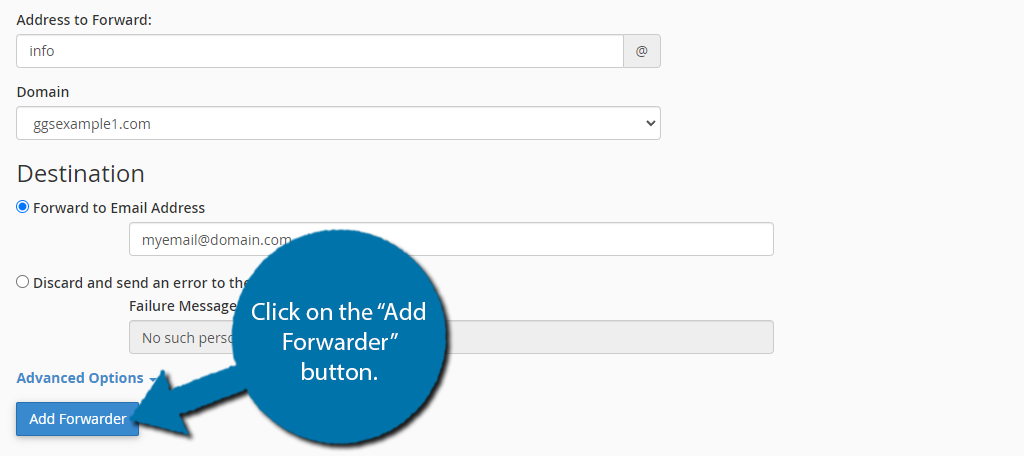
Enter the address you want to forward and choose its domain from the drop-down. For this tutorial, I am forwarding “sales” to a Gmail address.
In the “Destination” section, leave the radio button selected for “Forward to Email Address.” Enter the address where you want to receive messages.
Click the “Add Forwarder” button.
Now your email address will forward all incoming messages to the address you have set. From here, you can either click the “Go Back” link, go directly to cPanel, or close the browser window if you choose.
One Drawback of Email Forwarding
One thing to bear in mind is that some large ISPs treat forwarded spam as if the forwarding account is the originator of the spam. If enough spam is forwarded, they will block the forwarding domain’s IP address.
To avoid that kind of problem, you may want to explore alternatives to forwarding wherever possible.
The post Getting Started: Setting Up Email Forwarding appeared first on GreenGeeks Support.
]]>The post Getting Started: Using Softaculous to Install WordPress appeared first on GreenGeeks Support.
]]>This article assumes that you have your domain name transferred to your GreenGeeks account and that you are ready to install WordPress
Sign in to GreenGeeks. Once inside, you will see a green “CPANEL” button. Click on that to move to the cPanel portion of your hosting account.
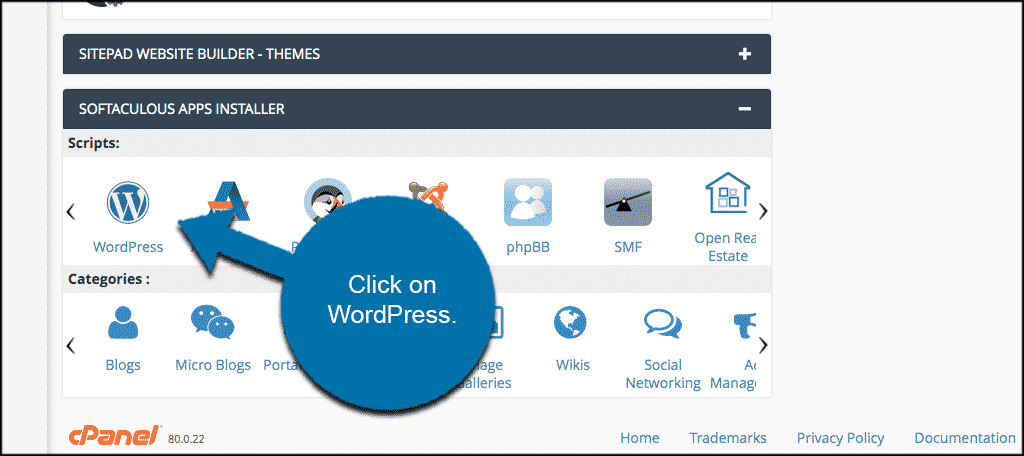
Once you are inside the cPanel scroll all the way down to “Softaculous Apps Installer” and click on WordPress.
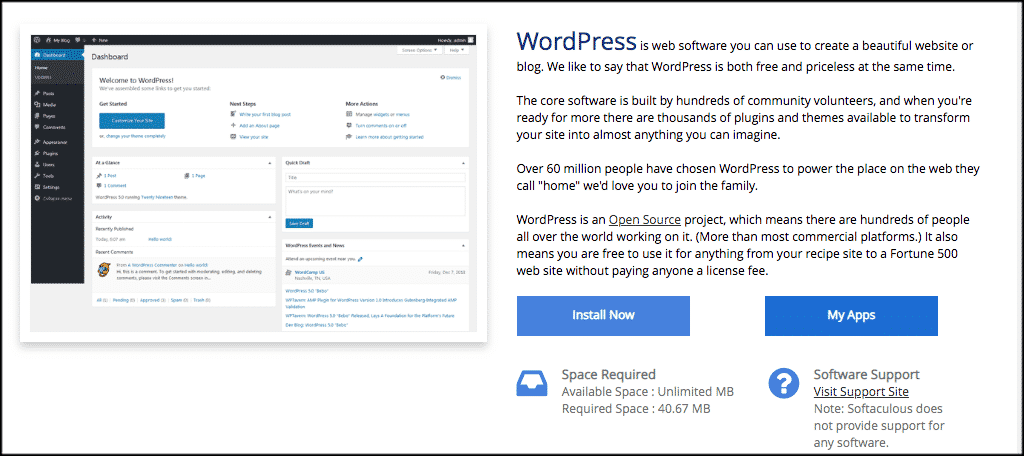
You will be taken to the one-click installer Softaculous offers for WordPress installations. Click on the “Install Now” button to start the installation.
From here, Softaculous allows you to choose the version of WordPress you want installed, the installation URL, and other site name and site description settings.
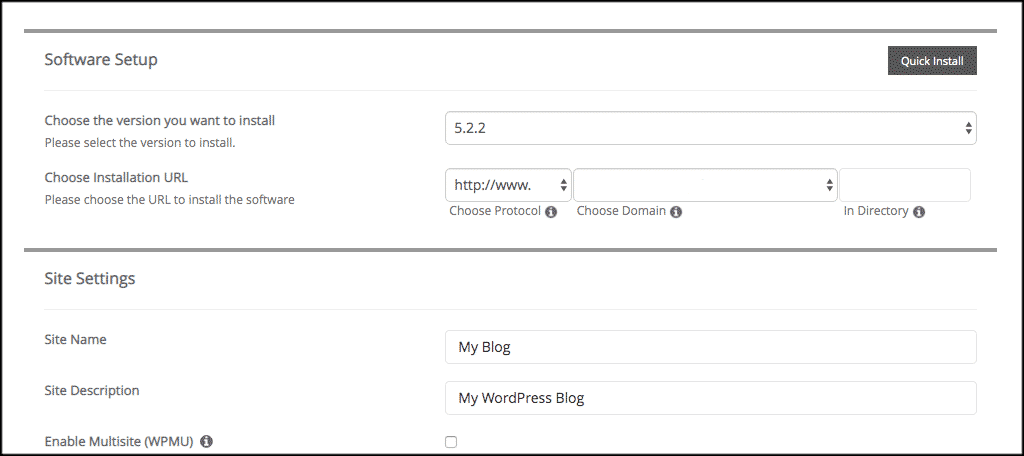
Fill out the rest of the settings to match how you want your site to be configured. When you are ready, click on the “Install” button at the bottom of the page.
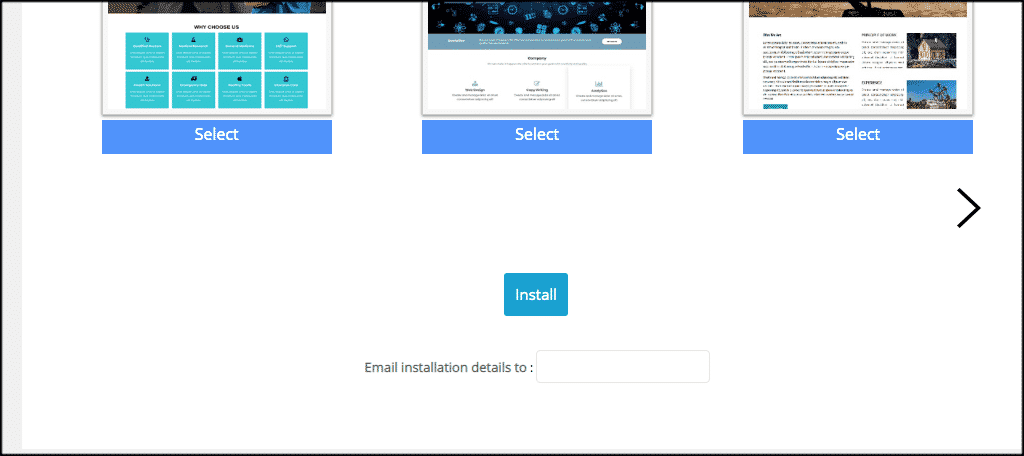
Note: You can have all the details of the installation sent to an email if you fill out the “Email installation details to” field.
That’s it! The installation should only take a few seconds. You can watch the install as it goes.
If you have any issues please Contact Support and we will be happy to assist you.
Other Helpful Resources
How to Install WordPress Using Softaculous: A Detailed Guide
The post Getting Started: Using Softaculous to Install WordPress appeared first on GreenGeeks Support.
]]>The post Getting Started: How to Reset Your GreenGeeks Account Password appeared first on GreenGeeks Support.
]]>Resetting a Lost GreenGeeks Account Password
If you need to reset a GreenGeeks account password, the process is fairly simple.
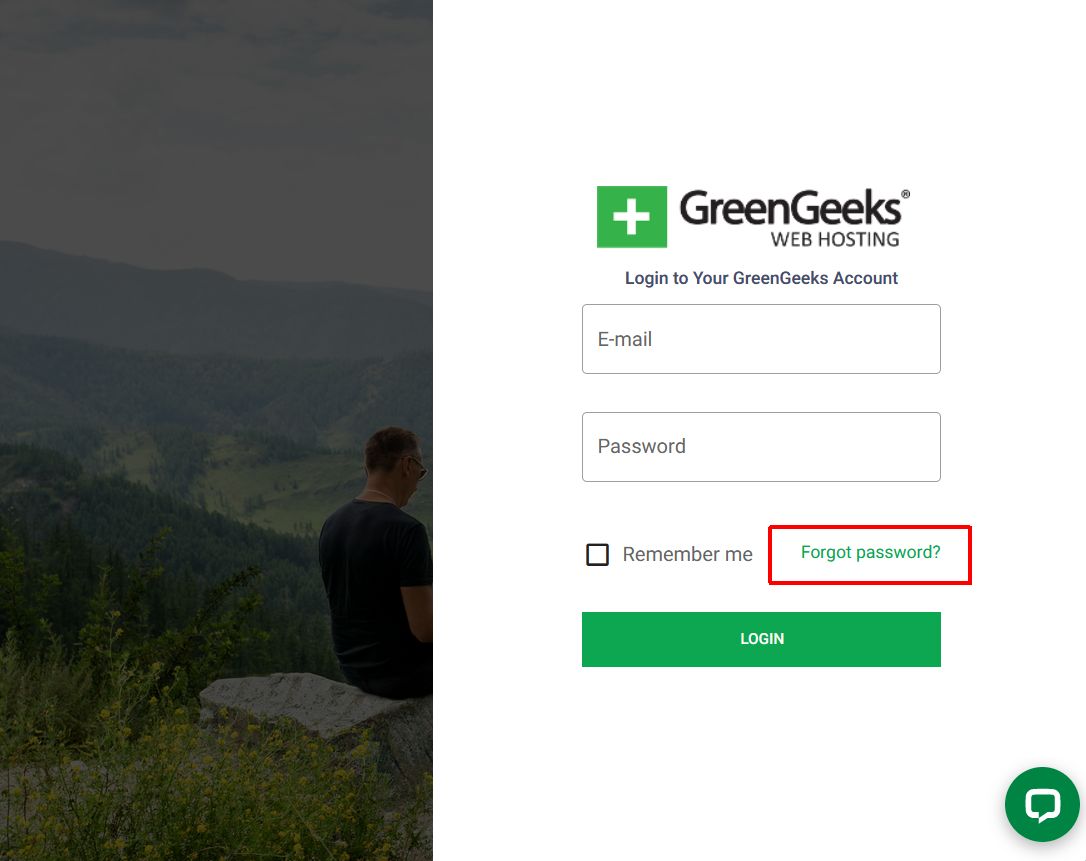
First, go to the GreenGeeks log-in page.
Password Reset Request Form
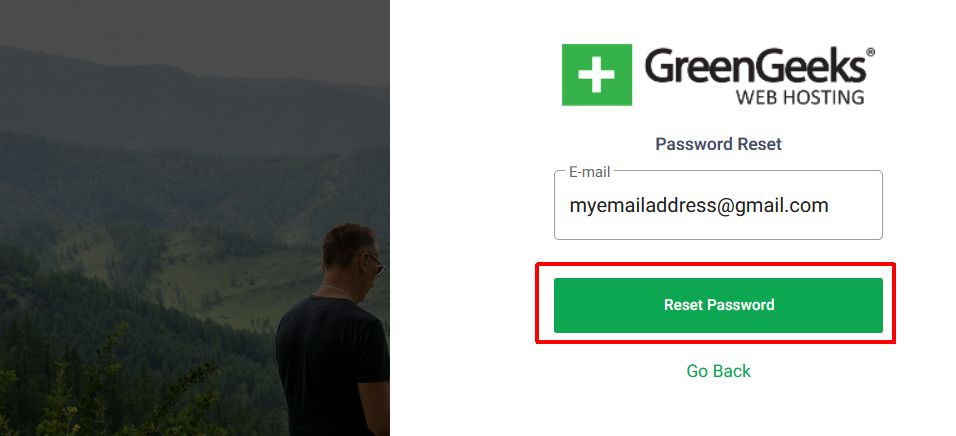
Click the “Forgot Password?” link under the login button.
Enter the email address used for your GreenGeeks account.
Click the “RESET PASSWORD” button.
You will see a confirmation message that the Request is Received and that an email will be sent within a few minutes.
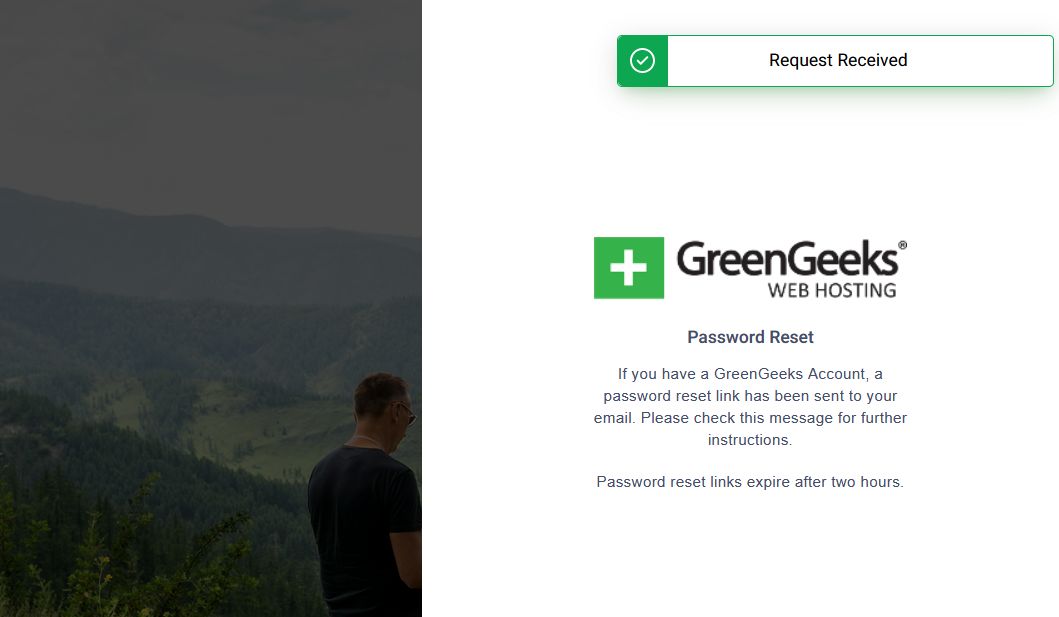
Note that simply seeing the confirmation message does not mean that this email is associated with a GreenGeeks profile. If no GreenGeeks profile is found associated with that email, no reset request will be sent.
Password Reset Request Email
After you’ve allowed a few moments, you will find an email from GreenGeeks, “Password Reset Request“, containing the link to the Password Reset form.
Click the link in the email, and you’ll be taken to the password input page.
Note that the link expires after two hours.
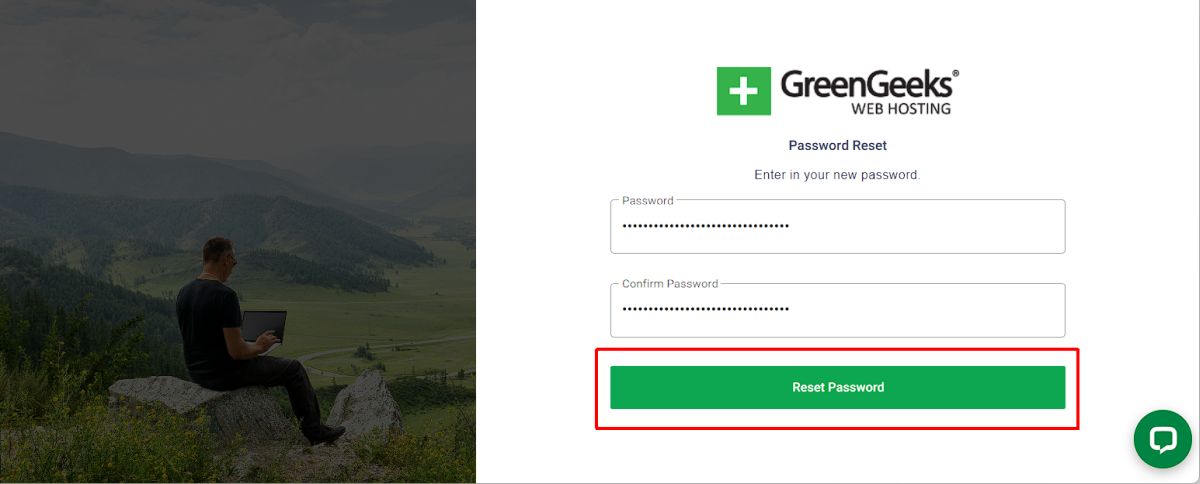
After clicking on the reset password link, you’ll be taken directly to the password reset page.
Enter your new password in both password fields.
Password requirements: The new password must be at least 8 characters but GreenGeeks recommends 16 character passphrases.
Most special characters are allowed(except for ‘ and “), including !@#$%^&*()_+<>?,.
For more information on passphrases, refer to the Support Article.
Once you have entered the new password twice, click the “Reset Password” button.
You’ll be redirected back to the main page, with an indication that the Password was successfully updated.

You can now log into your GreenGeeks Dashboard using the password that was just set.
Changing Your Existing GreenGeeks Password
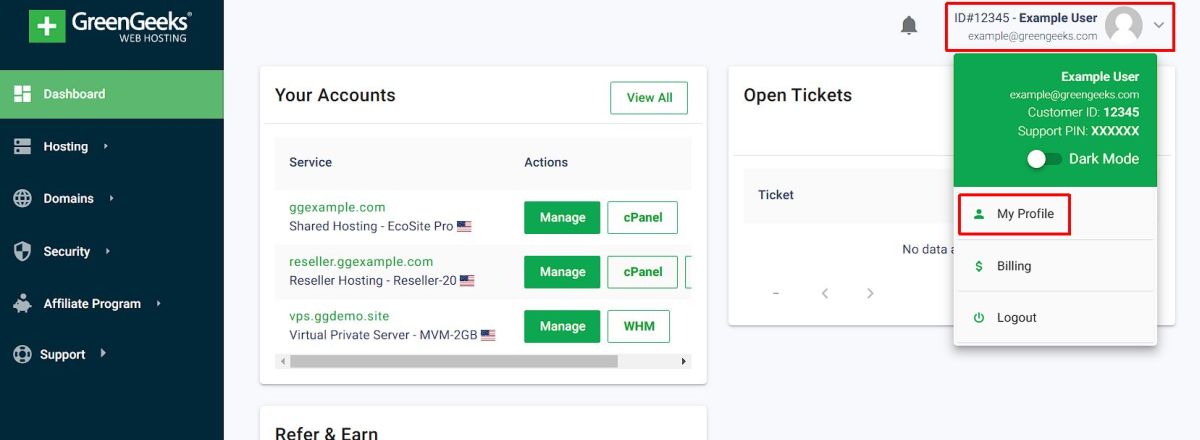
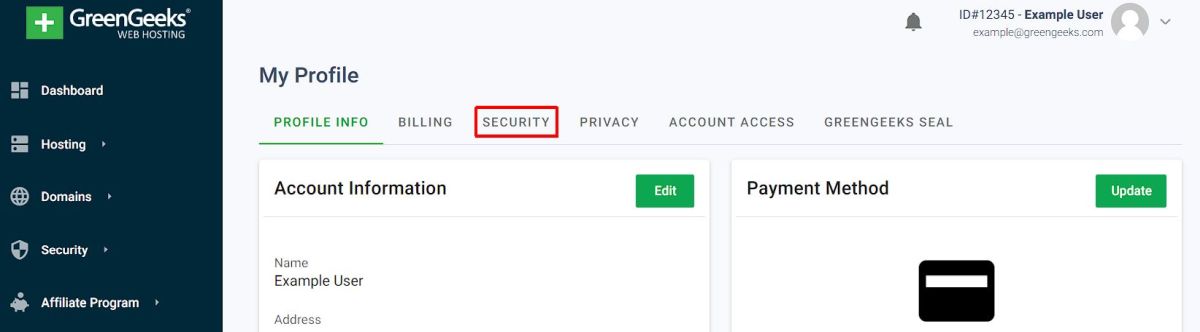
Click on the Profile link at the top-right, and select My Profile from the drop-down menu.
On the Profile page, select the Security tab to change your password, or enable 2FA.
On the Account Security page, locate the Change Password section.
Enter your current password in the first field, and the new password in the next two fields.
Password requirements: The new password must be at least 8 characters but GreenGeeks recommends 16 character passphrases.
Most special characters are allowed(except for ‘ and “), including !@#$%^&*()_+<>?,.
For more information on passphrases, refer to the Support Article.
After you have entered the Current Password and both entries for the New Password, click the Change Password button to finalize the process.

If the process was successful, you’ll see a Password Updated notification at the top-right.

If the Current password is invalid, or the New Passwords do not match, you’ll receive an error message indicating the issue.


What if You Don’t Remember the Email Address Used on Your GreenGeeks Account?
If you don’t remember the address you used when opening your GreenGeeks account, try searching your email for an Invoice from GreenGeeks, as Invoices are only sent to the Primary Account Owner’s email address.
If you can’t find the account email, please contact the GreenGeeks Billing Team for further assistance.
The post Getting Started: How to Reset Your GreenGeeks Account Password appeared first on GreenGeeks Support.
]]>The post Getting Started: Updating Your GreenGeeks Account Contact Information appeared first on GreenGeeks Support.
]]>If your street address, telephone number, or email address should change, please update your account contact information.
Updating Account Contact Information at GreenGeeks
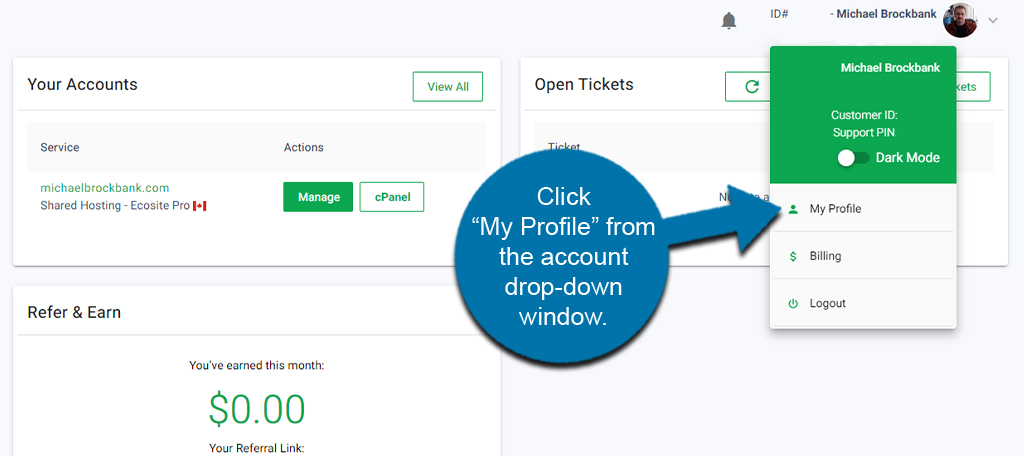
Using the drop-down arrow on the top right of your screen, click the “My Profile” link from the available options.

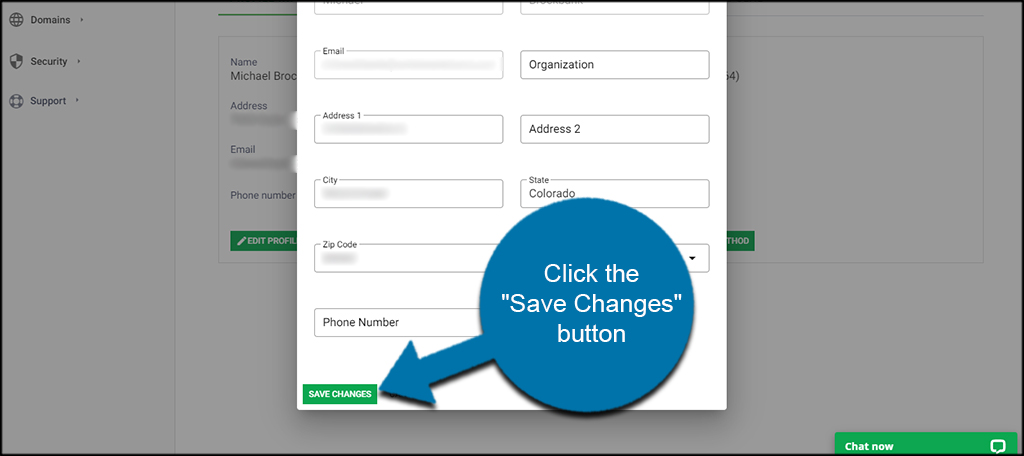
Click the “Edit Profile” button under your contact details.

After inputting the changes, click the “Save Changes” button and you’re done.
NOTE: In order to change the primary email address or name on the account, you’ll have to open a support ticket. This is to provide security regarding the information of your account.
We recommend using a contact email address that is not associated with your domain name so we will still be able to contact you if there is a problem with your domain name.
The post Getting Started: Updating Your GreenGeeks Account Contact Information appeared first on GreenGeeks Support.
]]>The post Getting Started: Updating Your GreenGeeks Payment Information appeared first on GreenGeeks Support.
]]>Make sure to check your payment details before your account is scheduled to renew.
Updating Payment Information at GreenGeeks
From your GreenGeeks dashboard, click your account information on the top right and click, “My Profile.”
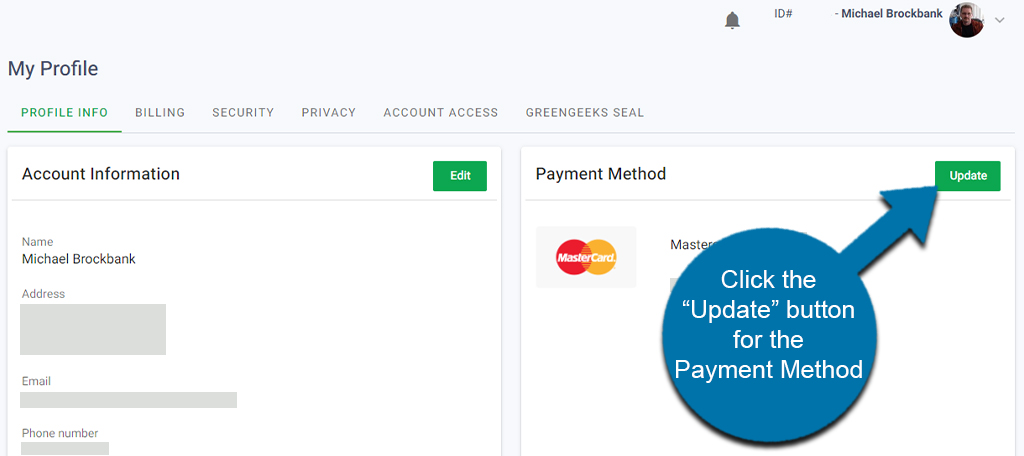
In the “Profile Info” tab, click the “Update” button for the Payment Method.
Input the details of your new credit card. Afterward, click the “Add Credit Card” button to submit the payment method.
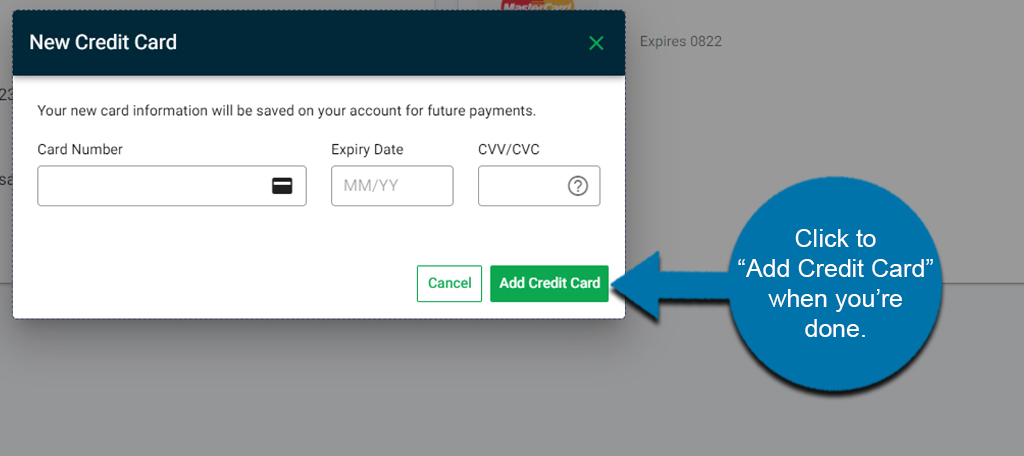
The new payment method will then be saved in your account.
GreenGeeks accepts major credit cards such as Visa, Mastercard, American Express, and Discover.
The post Getting Started: Updating Your GreenGeeks Payment Information appeared first on GreenGeeks Support.
]]>